
The Ultimate Guide to creating Subdomains in Webuzo Control Panel
Table of Contents
Introduction
Subdomains are an excellent way to organize your website and create distinct sections for specific purposes, such as a blog, store, or support portal, all while maintaining the same domain. The Webuzo Control Panel simplifies the process of creating subdomains, allowing you to manage and structure your website efficiently. Whether you’re building new content sections or testing a new project, creating subdomains can enhance your website’s usability and navigation. In this guide, we’ll show you how to easily create and manage subdomains in Webuzo hosting.
What are Subdomains?
A subdomain is a part of a larger domain, used to organize and navigate different sections of a website under the same primary domain. It functions as an extension of the main domain, typically created to host specific content or services, such as a blog, shop, or support center, without needing a separate domain name. For example, in the subdomain “blog.example.com,” “blog” is the subdomain, and “example.com” is the main domain.
Subdomains are useful for segmenting a website’s content, improving organization, and enhancing user experience by providing dedicated areas for different purposes. They are also commonly used for testing or staging environments where web developers can experiment without affecting the main site. Creating a subdomain does not require additional hosting resources, making it a cost-effective way to expand a website’s functionality.
Steps to Add an Addon Domains in Webuzo Control Panel
Access the Webuzo Control Panel by navigating to http://your-server-ip:2083 (user panel) or http://your-server-ip:2087 (admin panel).Enter your credentials and log in.

Navigate to Domain Management
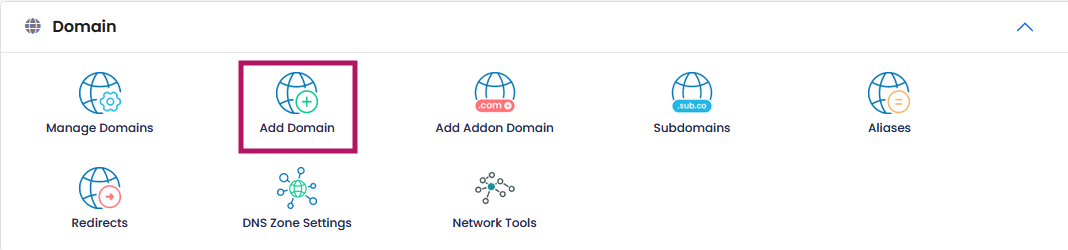
- Once logged in, locate the Manage Domains option under the “Domain” section.
- Click on Add Domain.
Add the SubDomain
- Enter the domain name you want to add as an subdomain.

Add the Subdomain
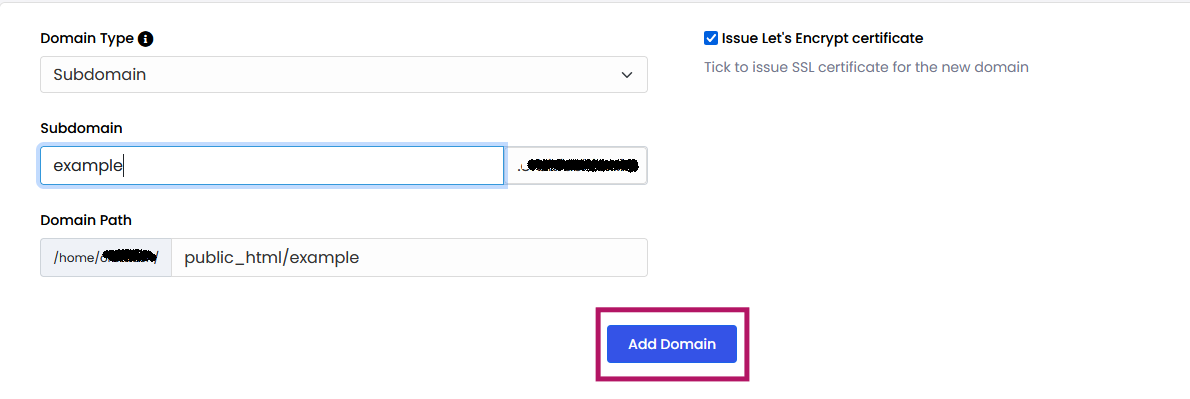
- In the Subdomain field, enter the subdomain you want to create (e.g., blog.yourdomain.com).
- In the Domain Path field, specify the directory where the subdomain’s files will be stored. Webuzo will create this directory automatically.
- Click “Add Domain option” once you have entered the domain name and path.
Configure DNS for Subdomain
- Ensure an A Record or CNAME Record for the subdomain exists in your DNS settings, pointing to your server’s IP address.
- If you’re managing DNS via Webuzo, add the necessary records.
Save and Apply
- Click Add Subdomain to save the changes.
- Restart Apache/Nginx if necessary for the subdomain to take effect.
Verify the Subdomain
- Visit the subdomain in your browser to ensure it is active and configured correctly.
By following these steps, you can add domains and subdomains in Webuzo.
Conclusion
Creating subdomains in Webuzo control panel is a straightforward and valuable process for website owners looking to enhance their site’s organization and expand their online presence. By setting up subdomains, you can better manage different sections of your site, each with its own unique purpose, while still operating under a unified domain. With Webuzo’s simple interface, you can quickly set up and manage subdomains, providing your users with a seamless and structured browsing experience.